Choosing Solar LED traffic blinkers in 2026 requires more than comparing brightness and prices. Roadside safety depends on visibility, reliability, installation quality, and consistent operation during changing weather. A well-selected blinker should remain noticeable through rain, dust, fog, and direct afternoon sunlight. It should also provide a clear warning without creating distracting glare for drivers, cyclists, or pedestrians.
This guide examines the practical details that influence performance. We will consider LED intensity, flash patterns, solar panel efficiency, battery capacity, charging time, and mounting stability. Location matters greatly. A unit installed beside a shaded rural curve may need a larger panel and stronger battery than one placed on an open urban road. Small design details matter.
Real-world testing is valuable. Check how quickly the light activates at dusk, whether it continues after several cloudy days, and how firmly its housing resists vibration. Look for weather-resistant materials, readable specifications, and dependable manufacturer support. Independent certifications can strengthen confidence, but certification alone does not prove long-term field performance.
There is no perfect model.
Some product claims may appear impressive but lack useful test conditions. That deserves careful questioning. This article offers a balanced framework for comparing Solar LED traffic blinkers in 2026, while recognizing that budgets, road layouts, and local maintenance conditions differ. The safest decision combines technical evidence with practical observation from the intended installation site.
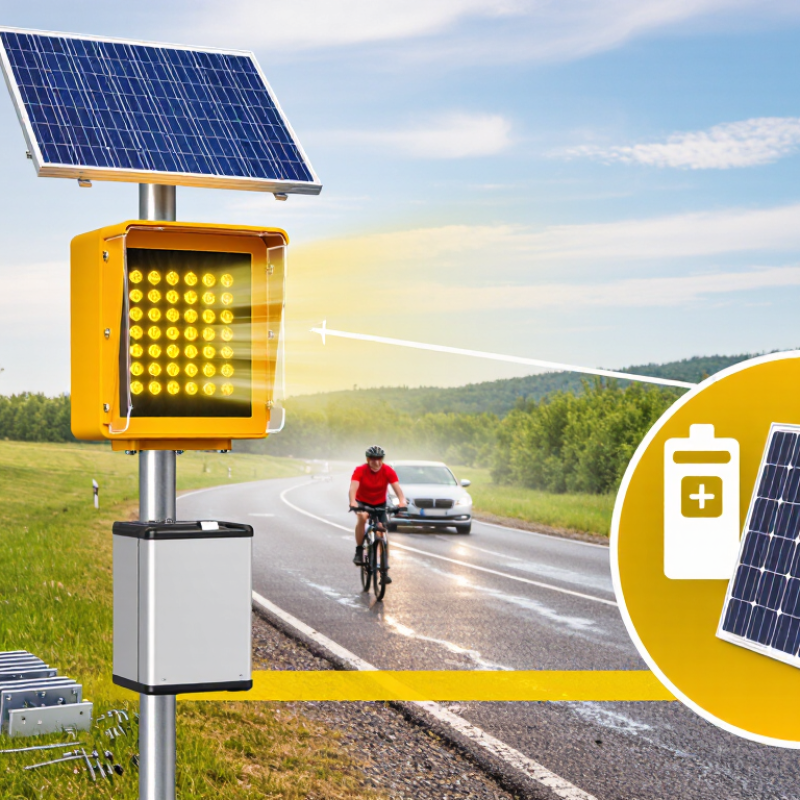
Start by identifying the exact traffic problem. A solar LED blinker may warn drivers about a sharp curve, school crossing, temporary lane change, or narrow work area. The purpose determines the flash pattern, brightness, mounting height, and viewing distance. Do not choose a unit only because it looks bright. Excessive glare can distract drivers, especially at night or during rain.
Location matters just as much. Measure the road width, approach speed, sunlight exposure, and distance from nearby buildings or trees. A roadside unit needs a stable mounting point and a clear line of sight. At an isolated rural junction, a larger solar panel and stronger battery may be necessary. In a shaded urban area, solar charging can be weaker than expected. That detail is easy to miss.
Check how people will see the signal from different angles. Drivers should notice it early, while pedestrians should not face uncomfortable glare. Select weather-resistant housing, secure fasteners, and a battery suited to local temperature changes. Confirm that the flashing color, installation height, and placement follow local traffic rules. Professional installers should also inspect visibility after installation, not just during daylight.
My own practical concern is simple: a well-designed unit can still fail if dust covers the panel or branches block the signal. Plan regular cleaning and seasonal checks.
When choosing solar LED traffic blinkers in 2026, compare candela, not lumens alone. Lumens describe total light output, while candela shows intensity in the viewing direction. The U.S. Department of Energy’s 2023 Solid-State Lighting report notes that modern LEDs can exceed 100 lumens per watt. However, poor optics can waste that efficiency. Look for a focused beam, even illumination, and clear visibility through dust, rain, and light fog. A bright lamp is not automatically a visible lamp.
Flash patterns also affect driver recognition. The FHWA Manual on Uniform Traffic Control Devices specifies a typical warning-beacon rate of 50 to 60 flashes per minute, with balanced on and off periods. Confirm the required pattern for your road authority and installation type. Alternating flashes may draw attention faster, while synchronized flashes can create a stronger visual wall across several units. Test the unit from 100, 200, and 300 feet, during daylight and at night. My field checks often reveal an uncomfortable truth: advertised performance can look weaker beside headlights.
Tips: Check the photometric report, battery capacity, panel angle, and low-temperature performance. Review ITE or SAE photometric requirements where applicable, then document the mounting height and viewing distance. A simple phone video is useful, but it is not a calibrated measurement. Do not rely on one cloudy-day test. Solar charging varies sharply with shade, dirt, season, and orientation. Choose a model with visible battery status and a conservative night-time power setting.
| Application | Recommended LED Light Output* | Preferred Flash Pattern | Typical Flash Rate | Visibility Planning Target | Solar and Battery Considerations | Important Selection Checks |
|---|---|---|---|---|---|---|
| Pedestrian Crossing or School-Zone Warning | Approximately 100–300 cd per flashing direction for a compact roadside beacon. Use amber or another color permitted by the local authority. | Alternating left/right flash for two-beacon systems, or a single-beacon flash where only one unit is installed. | 50–60 flashes per minute is a common traffic-warning target, with approximately 50% on-time. | Design for clear recognition from at least 150–300 m where road geometry and speed allow. | Select a system with at least 3–5 days of reserve autonomy after a fully charged battery. A larger panel may be required in winter or shaded locations. | Confirm mounting height, pedestrian sight lines, school-zone timing, audible or push-button compatibility, and local sign and beacon regulations. |
| Work Zone, Lane Closure, or Temporary Detour | Approximately 200–500 cd for roadside visibility; higher output may be needed for high-speed roads, long approach distances, or complex backgrounds. | Alternating flash for paired units. Avoid patterns that could be confused with emergency vehicle lighting or nearby signal indications. | 50–60 flashes per minute is widely used for warning beacons; follow the project specification. | Plan for detection from 300 m or the distance required by the approach speed and stopping sight distance. | Use a replaceable battery, a weather-resistant solar charge controller, and low-temperature charging protection when operating in cold climates. | Check work-zone standards, temporary traffic-control plans, impact resistance, ballast or wind loading, and whether the unit must remain visible during extended overcast weather. |
| Curve, Sharp Turn, or Hazard Marker | Approximately 100–300 cd for a single hazard beacon, subject to background brightness, mounting height, and approach speed. | A steady repeating single flash can work for one hazard; paired alternating units improve directional emphasis at bends and narrow approaches. | 40–60 flashes per minute, unless a local standard specifies a narrower range. | Target visibility from 150–250 m, with uninterrupted line of sight before the decision point. | Prioritize a wide-angle optical design and a battery sized for shaded roadside locations. Solar exposure should be evaluated at the winter sun angle, not only in summer. | Check glare control, horizontal viewing angle, snow or dust coverage, pole stability, and whether reflective signs are also required. |
| Intersection, Stop-Control, or Right-of-Way Warning | Approximately 300–800 cd may be appropriate for higher-speed or high-ambient-light approaches. The final value must meet the applicable traffic-control specification. | Use a synchronized or alternating pattern only when permitted by the traffic authority. Avoid multiple unsynchronized flashers that can reduce message clarity. | Common warning-beacon practice is 50–60 flashes per minute, subject to jurisdictional requirements. | Plan for 300 m or more where approach speed, terrain, and intersection geometry require early recognition. | Select a larger photovoltaic panel and battery reserve for continuous operation. Remote status monitoring can help identify low battery or charging faults. | Verify photometric compliance, color, synchronization, mounting height, cross-traffic visibility, and compatibility with the intersection control plan. |
| Railroad, Industrial Entrance, or Private-Access Warning | Approximately 300–1,000 cd may be selected for long approaches or strong ambient lighting, but railway and industrial authorities may impose their own photometric requirements. | Use a synchronized alternating pattern where two or more beacons are required. The pattern should be unmistakable and coordinated with gates, bells, or other controls. | Use the frequency required by the governing railway, industrial, or road authority. | Determine the target from the approach speed, stopping distance, crossing layout, and obstruction risk. | Consider a minimum 5–7 day autonomy target, sealed battery protection, lightning protection, and a maintenance alarm for critical locations. | Do not rely on a general-purpose flasher without approval. Confirm electrical isolation, synchronization, fail-safe behavior, and the required inspection schedule. |
| Low-Speed Private Road, Parking Area, or Campus Drive | Approximately 50–150 cd is often sufficient for short-range warning where ambient lighting is low and vehicle speeds are limited. | A single repeating flash or slow alternating pattern can provide adequate attention without excessive glare. | 30–60 flashes per minute, depending on the site plan and local requirements. | Plan for approximately 75–150 m of recognition distance and verify visibility from each entry approach. | A compact solar panel and battery may be adequate, but avoid placing the panel beneath trees, building overhangs, or permanent artificial shade. | Check night-time glare, pedestrian comfort, vandal resistance, mounting height, and whether a reflective sign should supplement the light. |
| Selection note: The candela ranges above are practical selection targets, not universal legal limits. Actual requirements vary by country, road classification, traffic speed, sign type, mounting height, ambient light, and authority having jurisdiction. Always verify the applicable traffic-control manual and project specification. Light output alone does not guarantee visibility: aim the optical beam correctly, maintain a clear line of sight, use the permitted warning color, and provide adequate battery reserve for consecutive cloudy days. | ||||||
*Candela indicates luminous intensity in a particular direction and is generally more useful than total lumens when evaluating roadside visibility. Manufacturer photometric data should identify the test method, viewing angle, flash duty cycle, and operating voltage.
How to Choose Solar LED Traffic Blinkers in 2026?
When selecting a solar LED traffic blinker, inspect the complete charging system, not only the panel size. A larger panel can still underperform when mounted beneath trees, dust, or a low winter sun.
Check the panel’s rated wattage, operating voltage, and real charging current. Ask for test data from cloudy days, not only bright laboratory conditions. A practical field check uses a multimeter at midday and records current over several hours. This reveals charging losses that brochures often hide. Panel orientation matters. Even a small tilt adjustment can improve daily energy collection. However, more panel area does not always solve poor placement.
Battery capacity should match nighttime demand and several low-sun days. Calculate watt-hours from LED power, flashing duty cycle, and operating hours. Leave reserve capacity for aging. Lithium iron phosphate batteries usually deliver steady performance, while sealed lead-acid units may lose usable capacity in cold weather. Temperature protection is important. Charging below the battery’s safe limit can cause damage.
Review the controller’s charging profile and protection features. Look for overcharge, over-discharge, and short-circuit protection. A basic controller may work, but it gives limited information when performance drops. I have seen installations pass a sunny test and fail after two rainy nights. That result is uncomfortable, but useful. Request autonomy figures at the coldest expected temperature, then verify them on site. Also inspect cable length, connector sealing, and panel cleanliness during every maintenance visit.
Evaluate solar panels, batteries, and charging performance under a clear-sky daytime cycle.
The comparison uses representative system configurations rather than company or brand data. A larger solar panel generally reaches a higher battery state of charge faster, while greater battery capacity provides longer overnight reserve. For reliable traffic applications, select a system that can restore most of its overnight energy during the available daylight period and maintain adequate reserve during cloudy weather.
Check Durability, Mounting Options, and Maintenance Needs
Durability Durability should match the installation environment, not just the product description. Look for impact-resistant housings, UV-stable lenses, sealed electronics, and corrosion-resistant hardware. An IP65 rating can help, but it does not guarantee performance after years of dust, freezing rain, or heat. Ask for test records, battery-cycle data, and operating temperatures. In field inspections, loose screws and cracked seals often appear before the LEDs fail. Small details matter.
Mounting Options Mounting options affect safety and service time. A pole bracket suits roadside use, while a barrier mount may fit temporary work zones better. Check the diameter range, bolt access, tilt adjustment, and wind exposure before ordering. A blinker should face approaching drivers without glare into nearby homes. Anti-theft fasteners may help, but they can slow repairs. That trade-off deserves honest consideration.
Maintenance Needs Maintenance should be simple enough for routine crews. Choose a design with accessible batteries, replaceable hardware, and a solar panel that can be wiped without special tools. Inspect panels for mud, leaves, and bird residue after storms. Check flash timing, lens clarity, and mounting tension during scheduled visits. Cold weather can reduce battery output, even when the panel looks clean. I once overlooked shadowing from a new sign, and runtime dropped sharply. Installation records would have prevented that mistake. Check local traffic authority requirements before deployment.
How to Choose Solar LED Traffic Blinkers in 2026?
Verify Safety Standards, Features, and Long-Term Value
Choosing a solar LED traffic blinker should begin with documented safety evidence, not attractive brightness claims. Ask for test reports covering electrical safety, electromagnetic compatibility, battery protection, and weather resistance. Check the label. Confirm that the product meets the standards required by your local road authority. Requirements may differ between public roads, private sites, and temporary work areas.
Inspect the light in realistic conditions. A useful unit should remain visible during rain, dust, winter darkness, and low sunlight. Review its flash pattern, viewing angle, solar charging performance, and overnight operating time. An automatic dusk sensor can reduce wasted energy. A protected battery compartment matters too. Look for sealed connectors, corrosion-resistant hardware, and a housing with a clearly stated ingress rating. Brightness alone is not enough.
Long-term value depends on maintenance, not only purchase price. Ask how often the battery, lens, or controller may need replacement. Confirm whether spare parts and technical support will remain available. Check the warranty terms carefully. A five-year claim means little without clear coverage conditions. In field inspections, small mounting weaknesses often cause avoidable failures. I have also seen solar panels shaded by nearby signs, reducing night-time reliability. That detail is easy to miss. Before approval, test one unit for several nights at the actual location, record charging results, and compare its performance after cloudy weather. A short trial may reveal problems that a specification sheet hides.
Compare candela for viewing-direction intensity, not lumens alone. A bright lamp may still look weak through dust or rain. Test it at 100, 200, and 300 feet.
Many warning beacons use about 50 to 60 flashes per minute. Confirm the required pattern with the local road authority. Alternating flashes may attract attention faster, while synchronized units can create a stronger visual wall.
Test during daylight and at night. Include light fog, rain, and nearby headlights. A phone video helps, but it is not calibrated. Look closely.
Panel size alone does not prove charging performance. Shade, dirt, winter sun, and panel angle can reduce energy collection sharply. Measure charging current around midday over several hours.
Match battery watt-hours to LED power, flashing duty cycle, and operating hours. Add reserve for aging and several cloudy days. Cold weather can reduce usable capacity. This calculation is easy to underestimate.
Check low-temperature performance, charging limits, and protection features. A suitable controller should prevent overcharging, excessive discharge, and short circuits. Request autonomy data for the coldest expected temperature.
Look for impact-resistant housing, UV-stable lenses, sealed electronics, and corrosion-resistant hardware. An IP rating helps, but it does not guarantee years of outdoor service. Cracked seals often appear before LED failure.
Check pole or barrier compatibility, bolt access, tilt adjustment, wind exposure, and glare direction. Choose accessible batteries and panels that can be wiped without special tools. Inspect mud, leaves, bird residue, flash timing, and mounting tension after storms. Shadows matter.
Choosing the right Solar LED traffic blinkers in 2026 begins with understanding their purpose and installation location. Consider whether they will guide drivers, alert pedestrians, mark hazards, or improve visibility at intersections, work zones, school areas, or private roads. Compare brightness, viewing distance, flash patterns, and day-and-night visibility to ensure the signal is noticeable without creating unnecessary glare.
Next, evaluate the solar panel, battery capacity, charging efficiency, and performance during cloudy or low-light conditions. A reliable unit should also offer weather-resistant construction, secure mounting options, simple maintenance, and durable materials suited to the installation environment. Check for useful safety features, dependable controls, and compliance with applicable local requirements. By balancing visibility, energy performance, durability, installation flexibility, and long-term operating costs, you can select Solar LED traffic blinkers that provide consistent warning performance and practical value throughout the year.